

Kjeld isn’t lazy, he just put off all maintenance on his KTM 500 EXC-F for about 130 hours.
For science.
I mean he did regular oil changes, he isn’t an animal, but beyond that and replacing tires and crash damaged subframes, he blew off all the rest of that pesky stuff…like valve checks.
He did it out of love for you, the reader, and even if something would have failed catastrophically, an engine rebuild makes for great blog and social media content. But here’s the thing. Nothing noticeably broke due to lack of maintenance, so much for KTM standing for Kick Til Monday.
That said, at 130 hours the valves seemed to be out of spec. The bike backfired on deceleration and at low throttle inputs, something that was first attributed to the GET ECU and/or the exhaust, but since it might be getting worse…
Time to at least check the valves. Here is how to do it in nine easy steps, and one slightly harder step that requires math.
Step one: Wash your bike, you heathen. Before you open up your engine and drop dust/dirt/mud/rocks into the valves, it is recommended that you start with a freshly cleaned motorcycle.
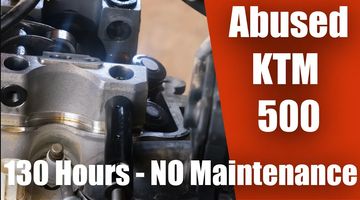
Step two: Remove seat, gas tank, and plastics. This allows you to see the valve cover, and more importantly the three screws that hold it in place.
Step three: Locate and remove the three screws that hold the valve cover on. They are all angled to make the task easiest performed from the rider’s left side of the bike and can be removed with a T-30. While down there you will also need to remove the vent line that is held on with a clamp, and it also might be necessary to pull the plug wire in order to wiggle the valve cover out of the frame.
Step four: This should go without saying, but do not drop anything into the motor. You don’t want to have to split the cases to remove a mishandled bolt or carelessly placed Cheeto. With the valve cover removed you will see the two exhaust valves up front, and the intake valves in the back. In order to check for clearance the motor must be rotated enough to remove pressure from the valve that you are inspecting. Rule sticklers will point out that top dead center is what the owner’s manual tells you to do, but the manual also tells you that you shouldn’t wait 130 hours to do your first valve check. Do what you want, but all that really matters is that the valves are not compressed when you take your measurements.
Step five: Taking care to assure that there is no pressure on the lobe you are inspecting, slide your feeler gauge in. The first part of the feeler gauge is the smaller measurement and should slip in with no force. The back part of the gauge should not slide through as it is the larger end of the scale.
Step six: “Write some shit down and do math on paper” - Kjeld.
Seriously though, you are dealing with fractions of millimeters here, and you want to make sure you get it right. If any of your valves either didn’t allow the feeler gauge under the lobe or let it slide through all the way, you need to then figure out what the actual measurement is and make a note of it as you have some adjustments to make.
Step seven: In order to access the shims you will need to lift the rocker arms. This is done by removing the four bolts that hold the assembly in place, but before you get all spanner happy, there is an order of operations. Work one set of valves at a time. Once you get the motor in a position where the rollers spin freely, loosen the bolts that hold the rocker arm pin in place. You can then thread in an extraction screw to the pin and pull it out far enough to remove the rocker arm. This process is substantially easier than many other bikes that we have owned, and we have to thank the engineers at KTM for making it a breeze!
Step eight: Remove the tired old shims with a magnet, and slot in the fresh new ones that fall within spec. Here is where those notes you took come into play, and yes, this is the math step. The allowed tolerance of the exhaust valves is between 0.12 and 0.17 millimeters. We found one of ours to be 0.25, and obviously in need of replacement. An ideal shim would bring the gap to as close to the middle as possible, or around 0.14.
If you subtract the midpoint number from the actual gap you will get the difference that you need to make up. After some quick math we discovered that the existing shim was 0.11 too small for the job, meaning that we needed to add 0.11 to the existing shim measurement. Using our trusty micrometer (don’t rely on the number printed on the old shim, you are replacing it for a reason) we measured the old shim at 2.2mm. For those of you not quick with a calculator, this means that to obtain the midpoint of the valve tolerance a 2.31 shim would be ideal. Since shims are not necessarily this precise, you may need to compromise a bit. In our case the closest shims to what we needed were 2.28 or 2.32. You should err on the side of looser if your measurements fall between standard sizes as a valve opening part way hurts your horsepower, where a valve that doesn’t close all the way hurts your motor… and that hurts your wallet.
Step 9: Reassemble the rocker arm in reverse order, still taking care to not drop anything into the motor. Make sure that you tighten to spec, as stripping one of these bolts is not our idea of a good time. Before moving on to the other valves it is a great idea to check the clearances of the shims that you just replaced. We’re not going to say that Kjeld reinstalled an old valve when he made a video for this project, but we are happy that he remeasured his work before putting another 130 hours on that poor thing.
Step ten: WIth all shims replaced and the rocker arm assembly torqued to spec, you can then reinstall the valve cover. If you notice that the gasket is brittle you can replace it at this time, we chose not to with no negative repercussions.
Then go ride the thing and marvel at how much better things run, kicking yourself for not doing this sooner.
Or not.
After riding the bike Kjeld noticed that the bike was still behaving the way it was prior to adjusting all four valves on the bike. It turns out that it was the GET ECU wanting Kjeld to just be on the gas all the time.There might have been a slightly crisper throttle response but then again it might have just been the placebo effect making us think that all our hard work did something.
And it did, kind of. It made us realize that we can go another 130+ hours before needing to even think about the valves again. Take that, owner's manual. Take it right down the top dead center. We should point out that ours may have been a unique case and we do not advise that you get all willy-nilly with your maintenance schedule.